I’ve rewritten this post a number of times now and I’ve been holding off because I wanted to finish some new container labels . Maybe I should have considered writing this in two parts but I just wanted it all together. That being said, you’ve been warned it’s a long one.
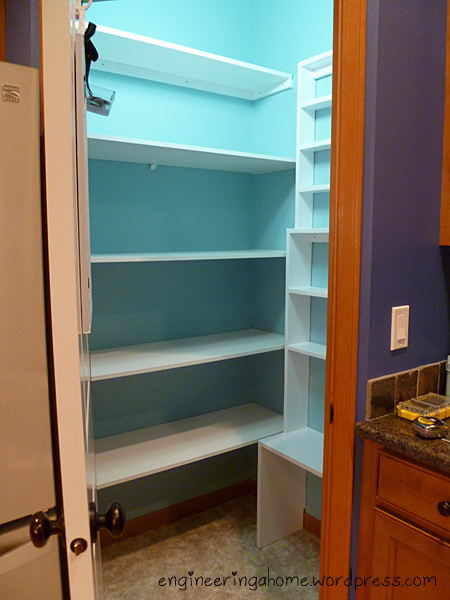
We have a pretty decent sized pantry. Not huge but it could defiantly be considered a walk in style. The major downside with our pantry is that the only shelving it had was 4 deep shelves. It isn’t really a great use of space and it’s pretty hard to organize things like cans that had to be all stacked on top and in front of one another.
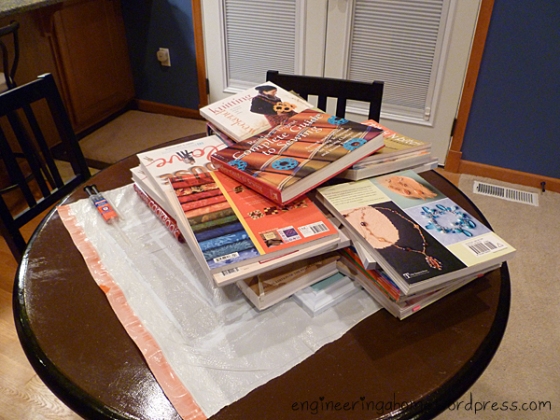
Unfortunately I didn’t take a before photo before I started cleaning out the pantry but you can imagine it was pretty much a mess. Here it is mid clean out.

The first thing I did was pull everything out of the pantry and empty all the shelves.

Since all that stuff had to go somewhere it ended up all over the kitchen.

Before I started the reorganization I knew that I wanted to repaint while the pantry was empty. I liked using the Acro Pure paint in the kitchen so I decided to try it out again. This time I had Sunken Pool from Martha Stewart Paint color matched in an eggshell sheen.

At first I thought I would just try to paint around the shelves but Chris came to the rescue. He figured out how to remove the shelves from their brackets which was much easier than expected and it made it so much easier to paint. I’m so glad we pulled them out otherwise it it would have been nearly impossible and I would never have been able to get a ladder in there big enough for me to reach the ceiling.

I’m pleased to say that just like last time the paint had pretty good coverage. The first coat did a good job and I just had to come back to touch up corners and do an all over light second coat with the large roller.

We went to the paint store late on Friday and unfortunately I was only able to get one of the two colors I wanted to use since there wasn’t enough time for the paint store to do a color match. Since the color I was able to get was the wall color and I’m way to impatient to wait to do things in the best order I ended up painting the ceiling last. My suggestion: just don’t do it. It worked out ok but I ended up making a mess on the wall near the ceiling and having to come back and cut a line with a small brush.
Again I used the Acro Pure this time in Love in a Mist from Martha in an Eggshell sheen. The Love in a Mist is a really light blue which is more of a white with a blue tinge.

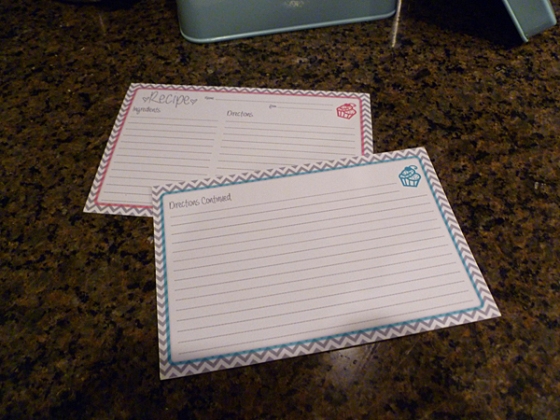
It’s hard to tell in the photos especially with the super florescent light that is in the pantry but Sunken Pool seems to be the best match to the “Martha Stewart blue” that’s in most of her kitchen ware. I took this photo for reference after it was all done and you can sort of see how my recipe box matches up to the paint color. So, if you’re looking for a paint color to match the Martha kitchen line here is what I think it is.

In between waiting for coats of paint to dry I worked on some new shelves for the pantry to replace a woefully inadequate wire shelf from target. Of course I was in such a hurry to finish I didn’t take many in action photos but it’s a pretty simple set up and tailored to our needs and pantry size.
The bottom is a 1×12 board which is the height of the first shelf already in the pantry. The next set (3 shelves) are made from 1×6 boards. The first of those shelves in the same height as the second shelf already in the pantry and the others are spaced about 9″ apart. The last tier is made of 1×4 boards and the shelves are just over 6 inches. There are also 3 – 1×2 cleats at the top of each tier to help stabilize it against the pantry wall.
I cut all my boards and drilled my kreg holes before I started to assemble which ended up being a mistake since I miscalculated how long the shelves and the cleats needed to be. Chris helped me salvage the wider boards but I ended up having to cut new cleats. I may be an engineer but simple calculations can be almost too much for me.

Once we got it all figured out and assembled I filled the visible kreg holes and they we got to sanding it all down.

Here’s a better side shot that shows how it went together and what the tiers look like from the side.
In the background Chris is sanding down the flat shelf that I planned on installing above the current highest self for even more storage!

Chris wanted to see what it would look like in the pantry before we took the time to paint paint it so here it is. It’s a good thing that we removed the shelves since we would have never been able to get this in the pantry fully assembled with the shelves still in.

Once we were sure it was ready to go we got to the painting. I used the left over primer from the garage cabinets which was the kilz 2 primer. I ended up doing 3 coats over two nights since primer dries much faster than normal paint and I was hoping to only have to do one coat of paint on top. I ended up using an off the shelf white interior paint and primer from Behr in a satin sheen. I only did one coat and it worked out pretty well. There are just a few spots that I didn’t get covered perfectly but they aren’t visible with everything put away and I can always go back and touch them up later.

After everything was dry we started installing all the new shelving in the pantry. We were lucky to hit two studs with the new shelving unit which we screwed to the wall using basic countersunk screws. Once that was installed we started installing the new top shelf using 1×2 cleats. We weren’t able to hit any studs on the sides so we had to use molly bolts for those but the center is screwed straight to the studs.

Here it the pantry with the old shelves installed again. It’s so hard to tell with the lighting but I’m not sure the original shelves were really a pure white but with all the shadows it’s really hard to see the difference. Maybe one day we’ll come back and change up the other shelving with somethings else to match all the new shelving.
Then I started putting everything back in the pantry.

Since we added the extra shelving I was able to spread out all my containers so that now I don’t have to move one container to get to another one that is hidden behind it. I even took this opportunity to create some new pretty labels to replace the labels I had handwritten before.
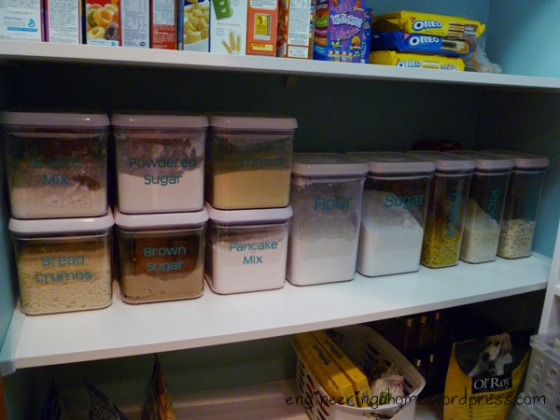
I love the way they look now. The labels are just so pretty and professional looking, they still make me smile.

Now here’s the new shelving unit in action. I planned it out so that the lower shelves are wide and tall enough for boxes of crackers, pasta, cake mixes and large jars. The higher shelves are intended to hold canned food.

It’s so nice to finally see all the cans set out and not shoved in a corner where we can hardly tell how much of each thing we had. With the deep shelf it was so hard to tell what we had and what we needed to get. Now all it takes is a glance and I can see exactly what we have and what I need to pick up on the next grocery shopping trip.

Since it’s always fun to compare side by side, here’s the before and after shot. Isn’t it just so pretty?

I think that it was worth the work to paint and fix up the pantry and I’m so happy with all the new shelving. We didn’t get rid of much that was in the pantry before but it looks so much better and less crowded than before.
Whew, congrats on making it to the end!
Anyone else been working on your pantry or food storage?
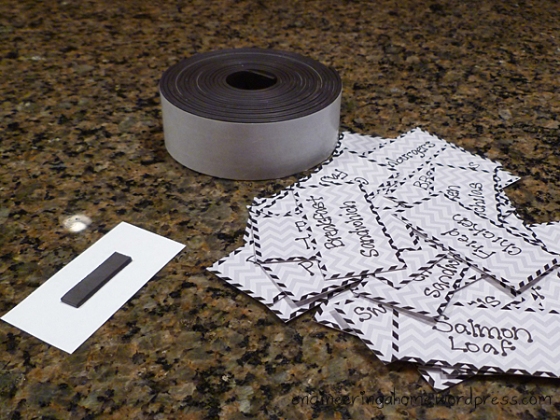
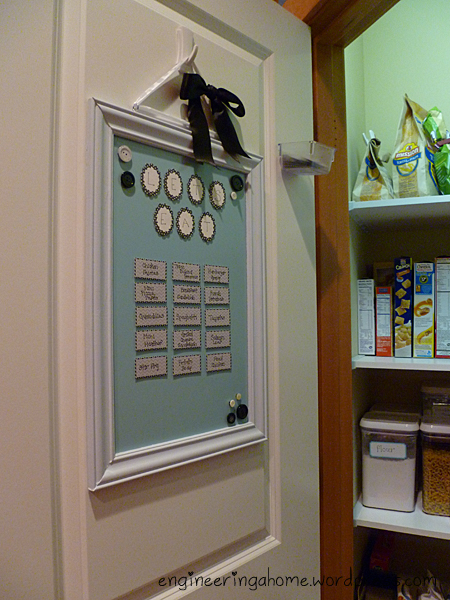
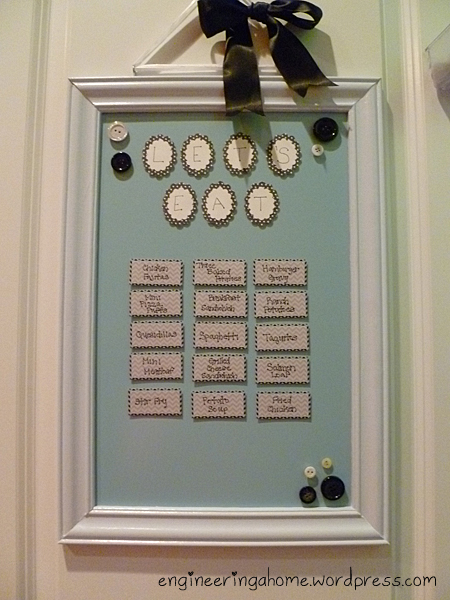
If you’re curious about the magnet board on the back of the door check it out here.